Off Axis Guiding with
The Taurus Tracker III
by Clayton Kessler
Most of you have heard me grousing and grumping about the problem of flexure between my telescope and a guidescope. I have even been known to call this the "Flexure Devil". It has made doing astrophotography a more difficult and frustrating experience. I finally solved this problem with the help of a device called the Taurus Tracker III. Some background on my setup and technique may be in order.
I have been learning the "art" of astrophotography for about three years now. I started out doing piggyback photography using my Meade 8" SCT. As with everyone that does this, I am constantly trying to use longer and longer focal lengths. I eventually acquired a Losmandy G11 mount and an ST4 autoguider system. These items have made it much easier to take astrophotos, but…….not all has been "beer and pretzels". Like everyone, as my skills have increased I have become much more critical of any imperfections. I now notice tracking and focus errors that I would never have noticed two years ago. I am currently working with the G11, a variety of camera lenses and a 4" f6 refractor. I have been using a C90 for a guidescope but try as I might, my photos show tracking error at random intervals.
When I decided to take an astrophotography trip to Tucson Arizona this winter I was determined to find and excorsize the "flexure devil" in my setup. I went through many mechanical tweaks but I was not able to remove the flexure totally.
Panic time started to set in around early December. I was going to be disappointed if I could not rely on good tracking with my Arizona astrophotos. I was browsing the Astrophoto Mailing List when I began to notice how many of the "big guns" used off axis guiders. I was looking through a Sky and Telescope magazine when I came across an ad for the Taurus Tracker III. A trip to the web site ( http://www.taurus-tech.com ) a call to the owner and a simple credit card-ectomy and a TT III was on it’s way.
The Taurus Tracker III is an interesting device. It is constructed of mainly plastic materials and is very light. The unit has four "Ports", the telescope port, the camera port, the guiding port and the viewing port. The "telescope port" and the "camera port" are simply the front and back of the unit. One end has an adapter to fit into a 2" focusser (a threaded SCT connection is also available) and the other end has a "T" thread to attach a camera. Each end adapter is held into the main body by four (4) nylon screws. Loosening these screws allows you to rotate the entire body, and/or rotate the camera 360 degrees.
The other two ports are for eyepieces or guiders. The viewing port is a helical focusser on a sliding tube. The sliding tube has a lockscrew and it is "keyed" to prevent rotation. At the end of the tube is a large diagonal mirror. At one end of tube travel the mirror is in the center of the light path and at the other end of travel the mirror is completely out of the light path. You can put an eyepiece into the port, focus it and view through your telescope just like using a diagonal. The really interesting use for this is for focussing your camera. You can calibrate the system by focussing your camera during the day on a bright, distant object. Then you slide the viewport tube down into the light path. Insert a moderate or high power eyepiece and focus with the viewport helical focusser (I use a 7mm Nagler). There is a lockscrew for the focusser and this should be locked down securely. When you are ready to take astrophotos, you can focus your telescope using the eyepiece, slide the viewport tube up out of the way and your camera will be in focus! Take it from me, it is much easier to focus through an eyepiece than through a camera viewfinder.
The last port is a guiding port. It is similar to the viewing port in that it includes a helical focusser but the tube position is fixed in respect to the TT III body. The tube ends in a small diagonal mirror that is in the fringe of the telescope lightpath but does not intrude into the camera / film lightpath. By rotating the TT III body it is easy to find a guide star on a reticule eyepiece or in an autoguider like my ST4. This works in a very similar manner to the Lumicon Giant Easy Guider and it is a very effective method of guiding through the same instrument that you are imaging through.
Taurus Technologies makes a number of focal reducers and barlows available that fit into their system. These make it easy to shoot at focal lengths other than the telescope prime focus.
I received the unit just before Christmas and I immediately wanted to give it a try. The "Great Grey Rock" of Michigan winter had settled in so I was looking for a clear night. I finally found one on New Years Eve so out I went to the observing site at Island Lake Recreation Area. I was able to get things set up with relatively little trouble and I started guiding the mount and taking pictures. I finally felt confident that the Arizona trip had a good chance of success.
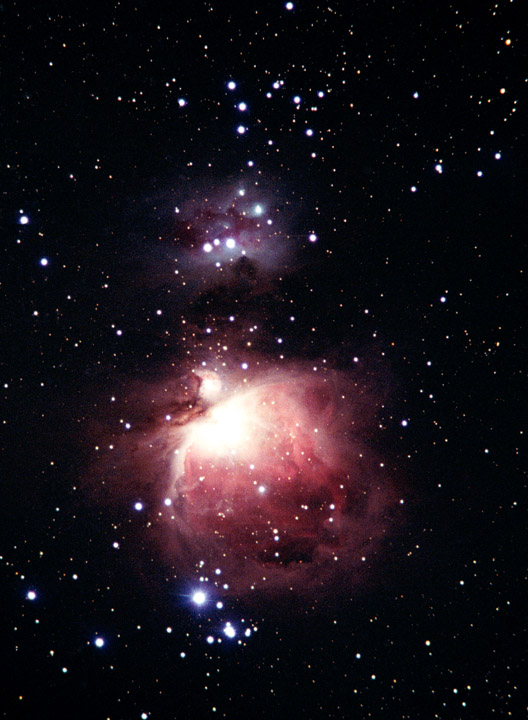
So – how did it work out? I gave the system a pretty good workout over three trips to the Empire Ranch dark site southeast of Tucson. Every shot with the 4" f6 refractor was well guided and well focussed – much better than anything previous to the TT III. A close look at my scanned images show nice small round stars, even at high magnification. I am very pleased with the results and overall with the Taurus Tracker. It has become an important tool in my imaging "toolbox".
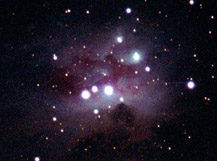
Of course, testing and research is never done. With this in mind I can see the need to travel back to Tucson on the next new moon and continue testing. I think I need to test the system some more on the cone nebula, and the seagull nebula, and the rosette nebula, and the……… well you get the idea. I will let you know how it turns out!